

insert signature in word: Adding your signature mark to a Microsoft Word record is a definitive method to customize it as your own, particularly for archives like letters or agreements. On the off chance that you need to add a mark to a Word report, here’s the secret.
There are a few different ways to add your mark to a Word record. You can include a mark line for a post-print signature, include an advanced mark, or addition your own written by hand signature as an image.
Include a Signature Line
A mark line gives you, or another person, with an area to sign a printed record. In case you’re anticipating printing your Word report, including a mark line is likely the most effortless route for you to include a mark.
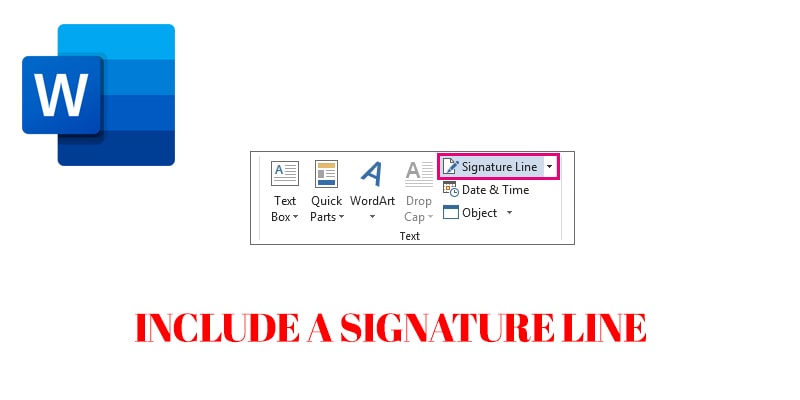
- To add a mark line to your Word
- click Insert > Signature Line.
- This symbol is normally remembered for the “Content” segment of your Word lace menu bar.
In the “Mark Setup” box that shows up, round out your mark subtleties. You can incorporate the name, title, and email address of the endorser. This can be you or another person.
You can likewise give directions to the underwriter. When no doubt about it, “alright” to embed your mark line.
When you’ve affirmed your signature choices, a mark line is embedded with a cross and a line to imply where to sign.
You would now be able to put this into a proper situation inside your Word report. The record would then be able to be marked at this situation in the wake of printing or, on the off chance that you’ve spared your Word report into the DOCX record design, you can embed a computerized signature into your archive now.
Embeddings a Digital Signature
To add an advanced mark to your Word archive, you’ll have to have adhered to the above directions and embedded a mark line first.
You’ll additionally need to introduce a security testament for your signature mark. On the off chance that you don’t have one, Word will inquire as to whether you’d prefer to obtain one from a “Microsoft Partner” like GlobalSign.
As another option, you can make your own computerized authentication utilizing the “Selfcert” , remembered for your Microsoft Office establishment envelope.
Discover “Selfcert.exe” in your Office establishment envelope and double tap it to open it.
In the Selfcert device, type a name for your security authentication in the “Your Certificate Name” box and afterward click “alright” to make it.
When you have an advanced declaration introduced, come back to your Word report and double tap on your mark line.
In the “Sign” box that shows up, type your name or click “Select Image” to embed an image of your transcribed mark.
click “Sign” to embed your advanced mark into the Word archive.
When marked, Word will affirm that the mark has been included.
On the off chance that you alter the archive in the wake of marking it, the advanced mark will get invalid, and you’ll have to sign it once more.
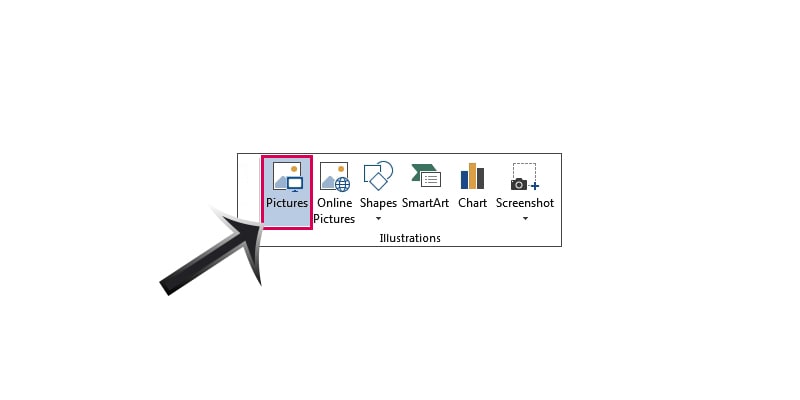
Including a Picture Signature
On the off chance that you’d like to utilize your written by hand signature, you can click a photo or output a duplicate of it and afterward transfer it to your PC. You would then be able to embed an image of your mark into the Word record.
insert signature in Microsoft word: click Insert > Pictures to embed the picture into your archive physically. Then again, double tap on your mark line and pick “Select Image” to embed it on your mark line.
In the “Addition Pictures” menu box, click “From a File” and select your mark picture document. From that point, click “Sign” to put the picture onto your mark line.
Once embedded, the picture record containing your signature mark will be embedded over your mark line.